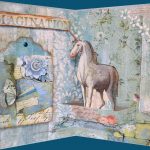
Unicorn Journal Page / Shaker Card. One of my favourite scrapbook papers so far, is the Stamperia Wonderland collection which has some beautiful unicorns and fairies. The main problem with it is that it is so gorgeous, I was afraid to cut it. However, I finally plucked up the courage and have started making a unicorn journal / mini album / pop up book. I am going to share the process over a series of posts.
For this post I am going to share the first page which I have finished. It may not be the first page in the finished journal, but it is the first page I have created.
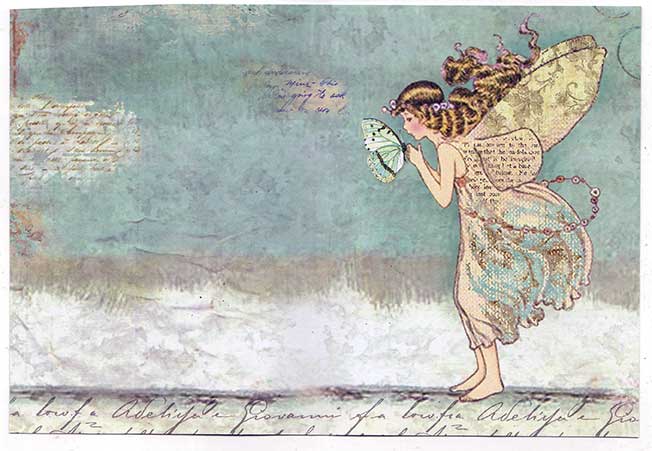
One of the first problems I found with this paper, is deciding which pages to use. They are all stunning. There are only ten double sided pages and only one of each design. I have to admit, that although double sided pages are handy for certain things they can be a pain when you can’t see the back as it seems such a waste. However, I finally found a few to use. For this page I used a sheet which has a fairy on it. Sometimes I like to use the images as pop-ups but this page was just too good to chop up.

Each of these pages in the following posts can be used as standalone cards, however, I will be making them into a journal at the end, when all are completed.
The first page created is the page with the fairy as in figure 1. I wanted the journal pages to measure approximate 6″ in height and 4.25″ wide with the cover measuring slightly more. The fairy in this page, sat half way up a 12″ x 12″ page. I didn’t want to chop her in half so I trimmed the top and the bottom so that she would sit in the middle.
The fairy page was beautiful enough to use without any extra adornments but I wanted to put embellishments on the other side. To allow for the extra depth, I started scoring from the fairy side. The first score line went at 4.25″, the second at 4.5″ and the third at 8.75″. I then used the 8.75″ score line as a guide for slicing. I put aside the off cuts for another project. Off cuts can be excellent for smaller projects such as altered tins or ATC’s.
I decided it would be quite nice to have a shaker card / coin on one of the pages. For this I used one of the floral elements, Figure 2. I angled it so that the text was diagonal to give a bit of extra interest. I made the frame by cutting a scalloped circle about a quarter of an inch bigger than the element and an internal circle around the same size as the element I used pearlescent white card for this and then stamped it with Distress Oxide ink in Broken China and used copper embossing powder over the top. The turquoise could be seen where the embossing powder refused to stick which matched beautifully with the paper. Instead of using acetate for the shaker card I used some scrap packaging from one of the dies which I had. It is much stronger than acetate and pretty useless to store the dies in as they are so hard to get in and out. It’s a great way of reusing plastic and reducing landfill.
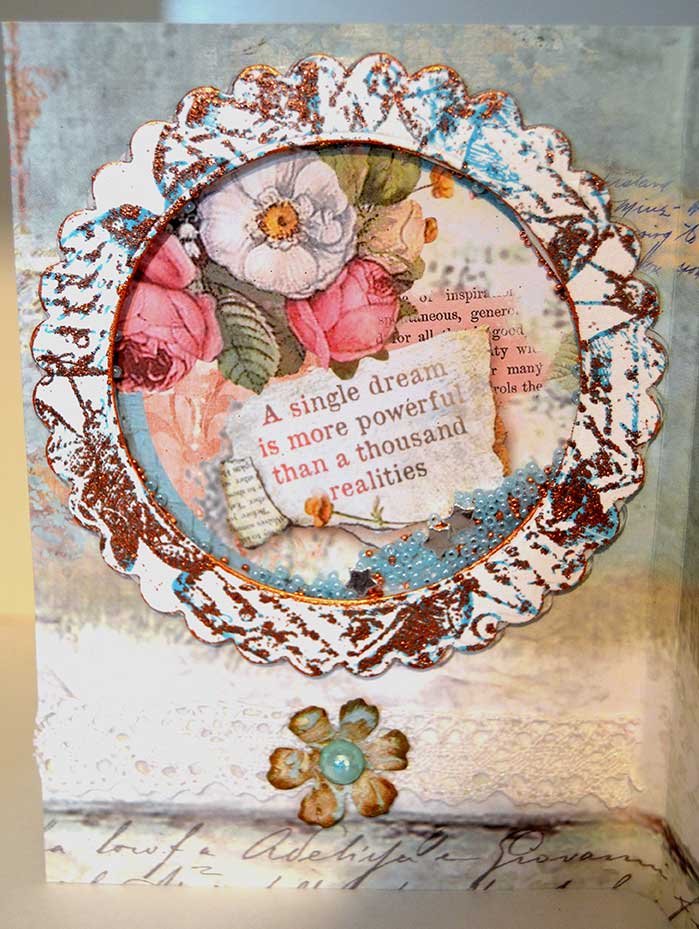
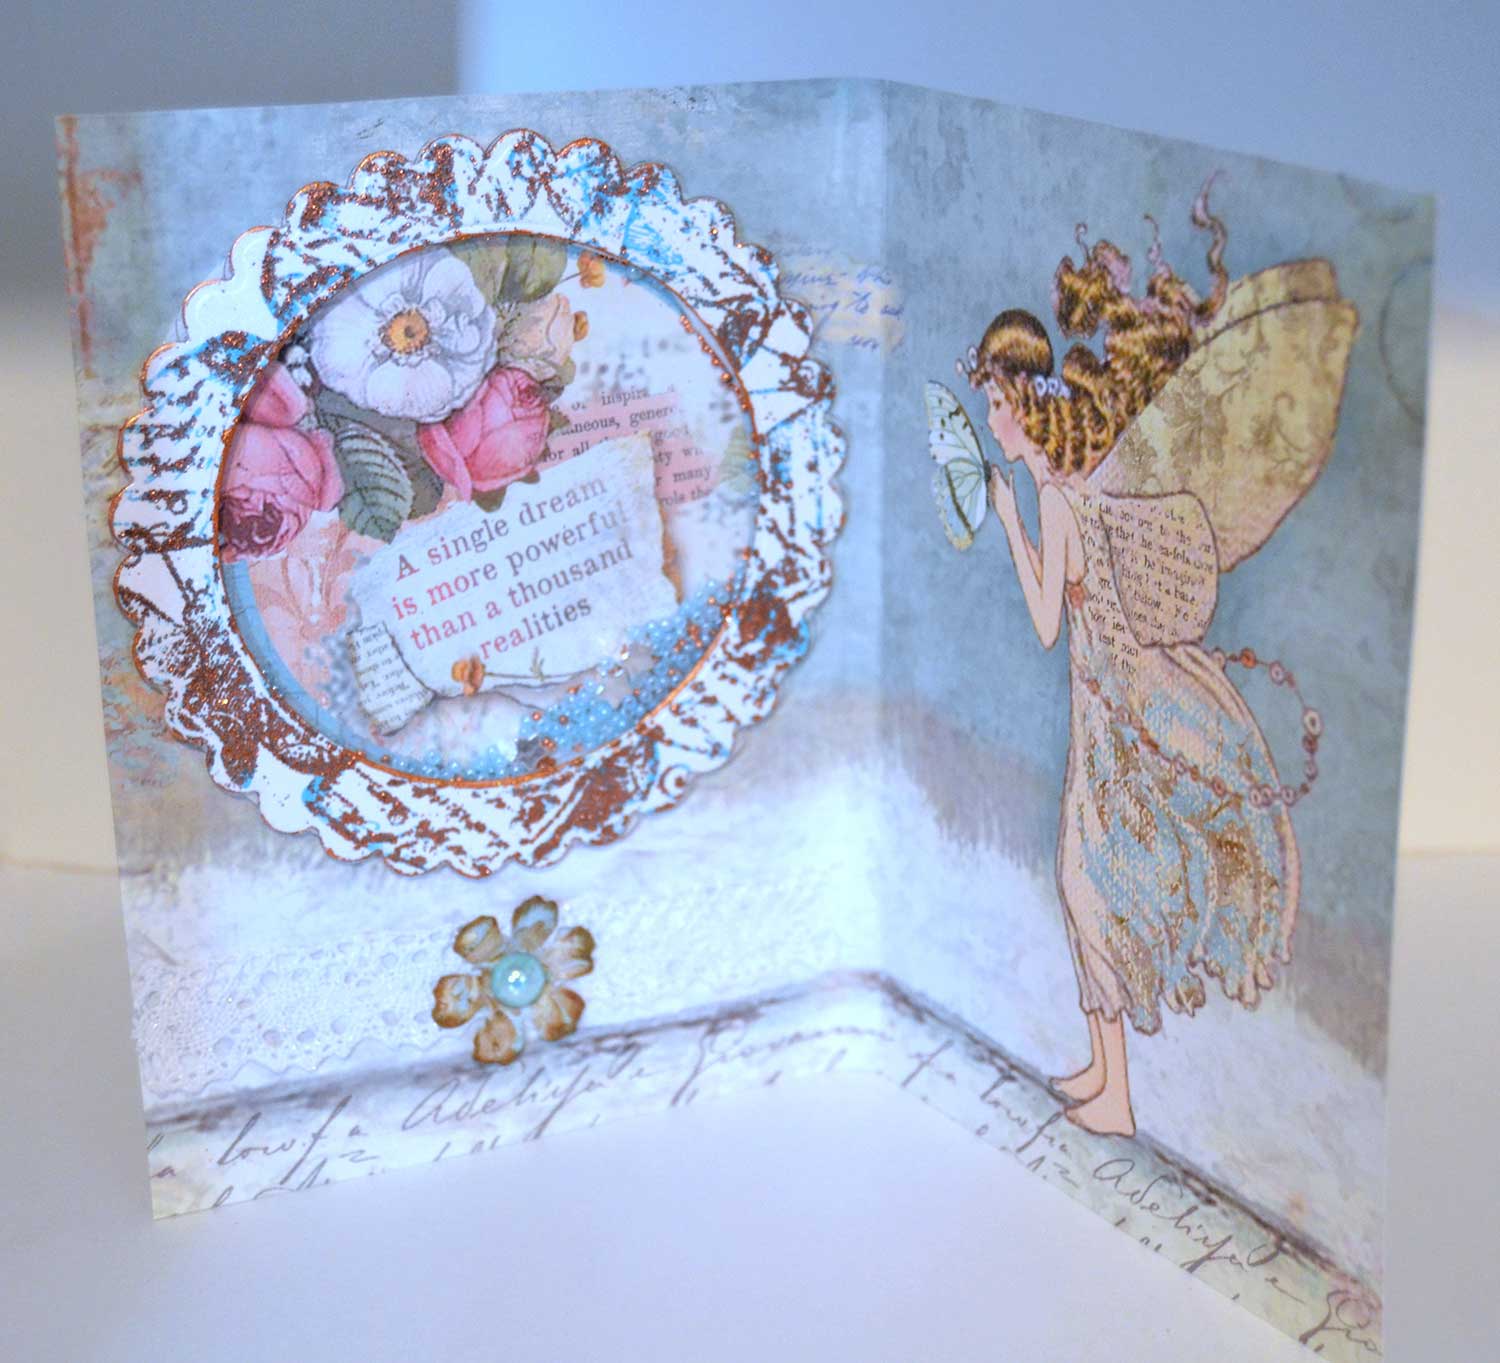
Stamperia Wonderland Journal Page / Shaker Card. Figure 4
I filled the shaker with some turquoise seed beads, some copper charlotte beads and a few silver star beads. For full details on how to make a shaker please visit my Fairy and Angel shaker card tutorial.
To finish off I placed some lace at the bottom of the page and made a matching flower for the center. Making flowers is more fiddly than using ready made ones but it works out much cheaper and you make them with off cuts of paper so that they co-ordinate nicely. The next page will be coming soon.